


Negative Bus, Grounding and Bonding Basics
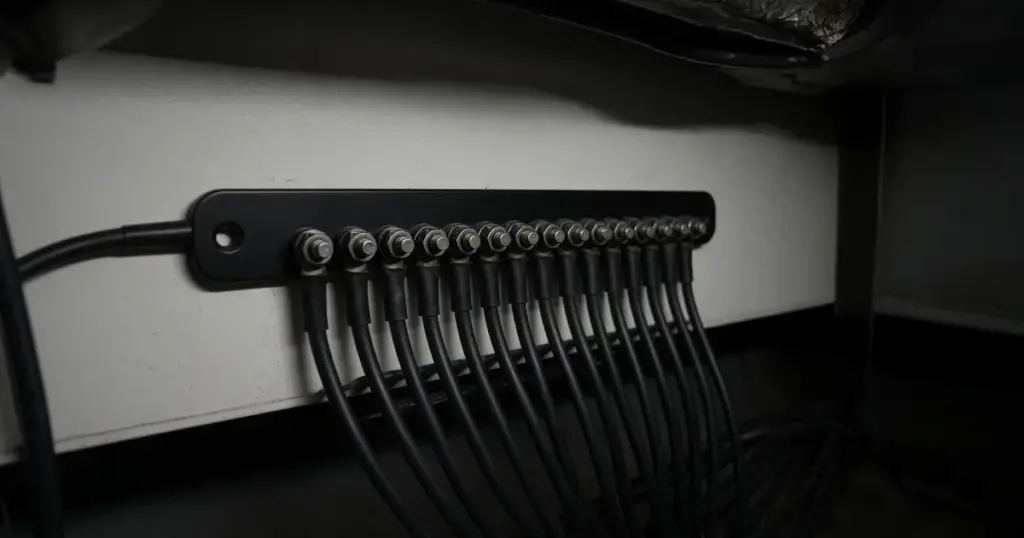
Most boat wiring problems people chase on the positive side actually live on the negative side. A flickering chartplotter, a bilge pump that runs slow, or a fish finder full of interference often comes down to a loose, corroded or overloaded return path. The negative bus is the part of a boat’s DC system that gets the least attention, and it carries every amp the positive side does. This guide explains what a boat negative bus is, how DC grounding works on a boat, and how to lay out a negative system that stays quiet and reliable.
What a negative bus does
A negative bus is a busbar that collects the negative (return) wires from every DC circuit on the boat and connects them back to the battery negative through one properly sized cable. Current flows in a loop. It leaves the battery positive, passes through the switch, fuse and load, and returns through the negative wire to the battery. If the return path is weak, the whole circuit is weak, no matter how good the positive side looks.
Without a bus, negatives tend to end up stacked on the battery post, spliced together under the console, or screwed to whatever metal was handy. Each of those is a future failure point. A dedicated bus gives every return wire a clean, labeled place to land.
Why boats don’t use the hull as a ground
Cars use the steel body as the return path. Boats should not, for three reasons:
- Most hulls aren’t conductive. Fiberglass and wood can’t carry current, and aluminum hulls should never carry it on purpose.
- Stray current causes corrosion. DC current wandering through metal fittings, an aluminum hull or underwater gear drives galvanic and stray-current corrosion that can destroy a lower unit or through-hull quickly.
- Shared metal paths create noise. Electronics sharing a return path with motors and pumps pick up interference.
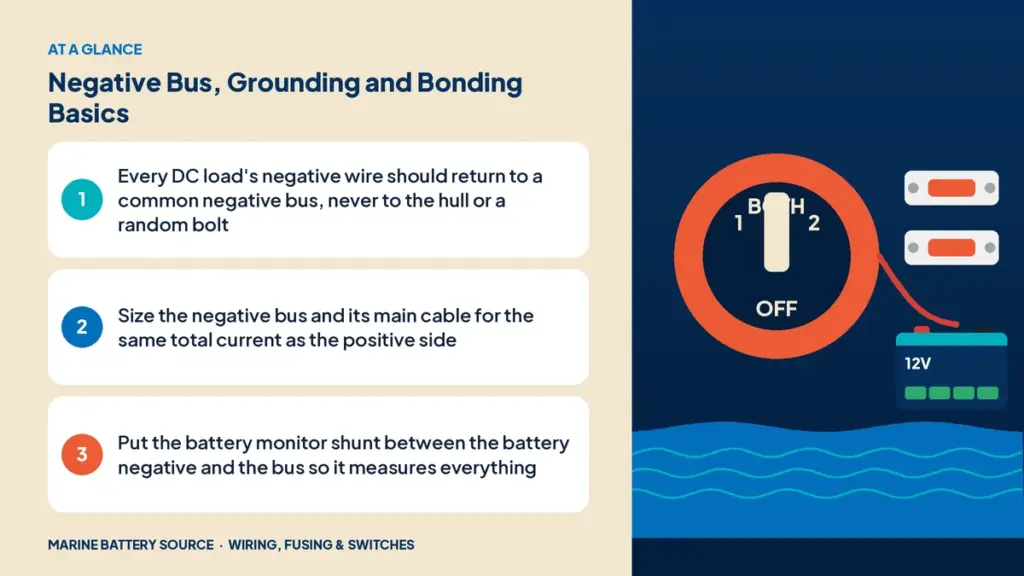
On a boat, every DC load gets its own dedicated negative conductor back to the negative bus. ABYC guidance follows this “two-wire” approach, and it’s the foundation of a reliable system.
DC negative vs bonding vs AC grounding
These three terms get mixed up, and they aren’t the same thing:
- DC negative: the current-carrying return wire for every DC load. It carries current all the time the load runs.
- Bonding system: green wires connecting underwater metals and through-hulls, often tied to zincs. It’s there to equalize potential and manage corrosion, and normally carries no load current.
- AC grounding (green wire): the safety conductor in shore power and inverter circuits. It carries current only during a fault.
On many boats, the bonding system and AC ground are connected to the DC negative at a single point, usually at the engine negative terminal or main negative bus. That single connection is deliberate. Connecting them in several places creates loops that carry current where it shouldn’t. If you’re unsure how your boat is bonded, have a qualified marine electrician check it before you change anything.
Sizing the negative bus
The negative bus carries the combined return current of every circuit connected to it, so size it the same way you’d size the positive side:
- Add up the maximum current of every circuit that returns through the bus.
- Choose a busbar rated above that total, with room for future loads.
- Size the main negative cable to the battery exactly like the main positive cable. Same gauge, same length considerations.
- Make sure the stud sizes match your lugs. Main cable studs are usually 5/16″ or 3/8″, branch studs smaller.
A common mistake is running a heavy positive cable and a thinner negative “because it’s just ground.” The negative carries the same current. Use our marine battery cable size guide to pick the right gauge for both.
Hardware like the EPOCH heavy-duty power distribution block works well as a main negative collection point for high-current cables, with a smaller multi-terminal bar for electronics and accessory returns.
Where the battery monitor shunt goes
If you have a battery monitor or a lithium battery with an external shunt, the shunt must sit between the battery negative terminal and the negative bus. Nothing else should connect to the battery negative post. That way every amp in and out of the battery, from the charger, alternator, inverter and loads alike, passes through the shunt and gets counted.
Typical order:
- Battery negative terminal
- Shunt (battery side)
- Shunt (load side)
- Main negative bus
- All branch negatives, charger negative, inverter negative, engine negative
If anything bypasses the shunt by landing directly on the battery, your state-of-charge readings will drift and you’ll lose trust in the monitor.
Multiple batteries and the negative side
When you add a second battery or build a house bank, the negatives need just as much care as the positives:
- Parallel banks: connect negatives with equal-length cables and take the main negative off the opposite end of the bank from the main positive, so each battery shares the load evenly. Our guide to wiring batteries in parallel covers this diagonal layout.
- Separate starting and house batteries: both negatives normally tie to a common negative bus so the engine, charger and loads share one reference. The positive sides are kept apart by the switch, ACR or DC-DC charger.
- Series trolling banks: the negatives inside a 24V or 36V bank are part of the series string. Only the bank’s final negative goes to the trolling motor. Don’t tie the series links to the boat’s 12V negative bus. See series vs parallel battery wiring for why.
If you run a 12V house system and a separate 36V trolling bank, keep the trolling motor’s negative on its own circuit unless the manufacturer of a DC-DC charger specifically requires a common negative.
Making good negative connections
A negative bus is only as good as each connection on it:
- Use tinned copper wire and properly crimped lugs. Our guide to crimping battery lugs walks through tooling and technique.
- One or two lugs per stud. Stacking four or five lugs on one stud leads to loose connections. Add another bar instead.
- Ring terminals only. Spade and fork terminals can slip off studs under vibration.
- Torque to spec. Loose nuts arc and heat up; overtightened ones strip or crack the base.
- Seal and protect. A thin coat of terminal protectant and a cover over the bus reduce corrosion and accidental shorts.
Common negative-side mistakes
- Grounding electronics to the engine block or a random bolt. Run a dedicated wire to the bus instead.
- Undersized main negative cable. It causes voltage drop and heat under heavy loads like a windlass or inverter.
- Daisy-chaining negatives. Running one negative from load to load means the last device sees the combined voltage drop of all the others.
- Negatives on the battery post when a shunt is installed. Everything has to pass through the shunt.
- Mixing bonding and DC negative in multiple places. Keep the connection at one point.
- No labels. Six months later nobody remembers which black wire is which. Label both ends.
Electronics and noise
Sonar and radio are sensitive to noise on the negative side. Give electronics their own branch of the negative bus, or a small dedicated bar fed from the main bus, and run each unit’s negative straight there rather than sharing a wire with pumps or lights. Keep the negative and positive for each circuit run together; twisting or bundling the pair reduces induced noise. If your fish finder shows interference only when the trolling motor runs, check that the trolling motor and electronics aren’t sharing a negative path.
Testing your negative side
A quick voltage-drop test finds most negative problems:
- Turn on the load you want to test so current is flowing.
- Put one meter lead on the battery negative post and the other on the load’s negative terminal.
- Read the voltage. On a healthy circuit, the negative side drop should be a small fraction of a volt, well under 3% of system voltage combined with the positive side.
- If it’s high, move the lead back toward the battery, connection by connection, until you find where the drop happens.
This test catches corroded lugs, loose bus nuts and undersized wires that look fine to the eye. Our voltage drop guide has the full method and acceptable limits.
Laying out a clean system
A tidy boat electrical system usually looks like this:
- Battery positive goes through the main fuse to the main battery fuse, then the battery switch, then the positive bus or fuse block.
- Battery negative goes to the shunt (if fitted), then the negative bus.
- Each circuit runs its positive from a fused position on the fuse block and its negative back to the negative bus.
- Positive and negative buses mount near each other but with covers and clear spacing, so a dropped wrench can’t bridge them.
A fuse block on the positive side and a matching negative bar side-by-side make the system easy to read and expand. For the bigger picture, see our marine battery wiring guide and busbar and power distribution guide.
Frequently asked questions
Can I connect negatives directly to the battery post?
You can for a very simple boat with one or two loads, but a negative bus is better. It cuts down on stacked lugs, and if you have a battery monitor shunt, nothing except the shunt should connect to the battery negative.
Does the negative cable need to be as thick as the positive?
Yes. The negative carries exactly the same current as the positive in each circuit, so size it the same.
Should I ground my trolling motor to the boat’s negative bus?
Usually not. A 24V or 36V trolling bank should stay on its own circuit, with its negative running straight back to the bank. Check your charger and DC-DC charger instructions, since some designs need a shared negative.
Is bonding the same as grounding?
No. Bonding connects underwater metals to manage corrosion and normally carries no current. The DC negative carries load current all the time. The two are usually joined at a single point.
What causes interference on my fish finder?
It’s often a shared or poor negative path with noisy loads like the trolling motor, pumps or the engine. Give electronics a dedicated negative run to the bus and check for loose or corroded connections.