


Trolling Motor Power Systems: Wiring, Charging and Runtime
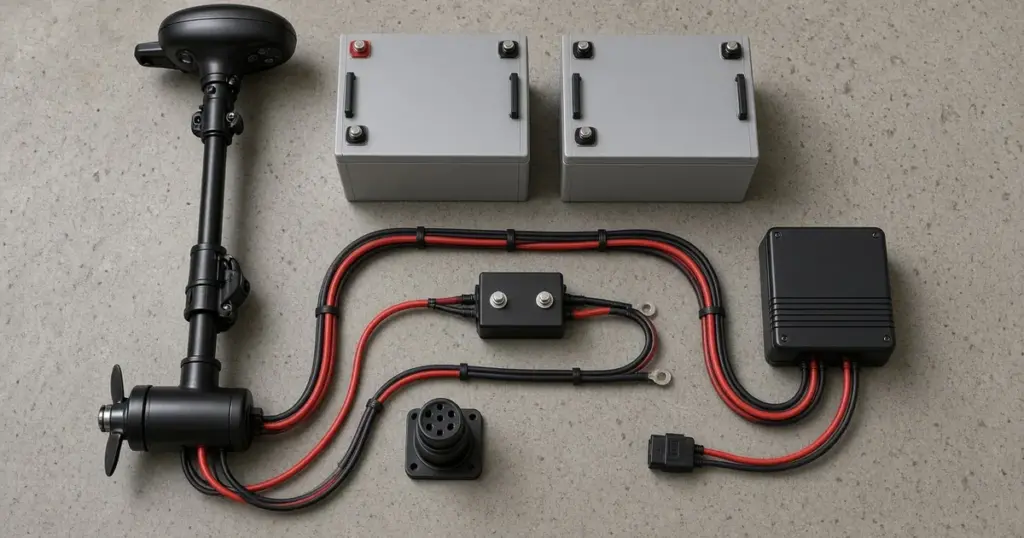
A trolling motor is only as good as the power system feeding it. The battery gets the attention, but the cables, breaker, plug, charger and even the way you fish all decide how much thrust you get and how long it lasts. This guide walks through the whole trolling motor power system from battery terminal to prop, and links to detailed guides for each piece.
The five parts of a trolling motor power system
- Batteries: the energy store, at 12V, 24V, 36V or 48V.
- Cables: carry current from the batteries to the motor.
- Circuit protection: a breaker or fuse that protects the cable from overcurrent.
- Connectors: a plug and receptacle, or direct terminal connections.
- Charging: an onboard charger, portable charger, or DC-DC charger from the engine.
Each part has to be sized for the motor’s maximum current. A weak link anywhere wastes energy as heat and lowers the voltage at the motor.
Batteries: the foundation
Choosing the battery comes first, and our pillar guide on choosing a trolling motor battery covers voltage, thrust and capacity. A few system-level points matter here:
- Series strings of 12V batteries should be identical in model, capacity and age.
- A single-case 24V or 36V lithium battery removes the series jumpers entirely.
- Battery location affects cable length, which affects voltage drop.
If you are converting an older bank, see our step-by-step guide to upgrading a 36V bank from lead-acid to lithium. Store options at 36V include the EPOCH 36V 50Ah Essential in a Group 31 case and the Interstate Li31M 36V 50Ah.
Wiring the batteries together
For 24V and 36V systems built from 12V batteries, the series jumpers connect positive to negative between batteries, and the motor leads come off the two free terminals at the ends. Our guide to wiring 24V and 36V trolling motor batteries has diagrams and the common mistakes to avoid.
Use jumpers of the same gauge as the main motor leads. A thin jumper is a bottleneck just like a thin main cable.
Cable size and voltage drop
Long cable runs are normal on bass and bay boats, where batteries sit in the stern and the motor is on the bow. That can mean 20 feet or more each way. Voltage drop over that distance depends on wire gauge and current. Too small a wire means less voltage at the motor, less thrust, and warm cables.
Our trolling motor wire size and breaker guide explains how to calculate drop and choose gauge. Most motor manufacturers publish minimum gauges for different extension lengths, and those should be your starting point.
Circuit breakers and fuses
Every trolling motor circuit needs overcurrent protection on the positive lead, close to the battery. It protects the wire, not the motor. Most motor makers specify a breaker rating in the manual. A manual-reset breaker also doubles as a convenient disconnect when you trailer the boat.
Plugs and receptacles
A trolling motor plug lets you remove the motor or disconnect it quickly. It must be rated for the motor’s current and the wire gauge you’re using, and it should be kept clean and tight. Corrosion in a plug is one of the most common causes of power loss. See our guide to trolling motor plugs and receptacles for what to look for.
Charging the bank
How you charge has a big effect on battery life:
- Multi-bank onboard chargers charge each 12V battery in a series string separately. They are the standard on tournament boats.
- Single-output chargers at 24V or 36V suit single-case lithium batteries.
- DC-DC chargers let the outboard’s alternator charge the trolling bank while you run between spots.
The store carries options such as the EPOCH 12V-36V onboard lithium charger and the EPOCH 12V-to-36V DC-DC charger for charging on the run. Our guide on how to charge trolling motor batteries covers each approach.
Electronics and the trolling bank
Many anglers wonder whether to power graphs from the trolling bank. It’s possible, but it can create interference, unbalance series strings and shorten trolling time. Our article on running electronics off the trolling motor battery explains the options, including a dedicated electronics battery.
Runtime: where the energy goes
Your runtime depends on capacity and how hard you run the motor. GPS anchoring features hold position by pulsing the motor constantly, which can draw more than you’d expect in wind and current. Read how spot-lock affects battery life and our list of ways to extend trolling motor run time.
Weight and placement
A trolling bank can weigh anywhere from about 20 lb for a single lithium battery to more than 200 lb for three large lead-acid batteries. Where it sits affects how the boat planes, tracks and drafts. See our guide to battery placement and weight distribution.
A healthy system at a glance
| Component | What good looks like |
|---|---|
| Batteries | Matched set or single case, sized for a full day with reserve |
| Cables | Gauge chosen for current and round-trip length, tinned copper |
| Breaker | Rated per motor maker, mounted near the battery |
| Plug | Rated for the current, clean, tight and dry |
| Charger | Correct profile for the chemistry, one output per 12V battery in a series bank |
| Connections | Clean, tight, crimped lugs with heat-shrink |
Common system problems
- Motor slows through the day: typical lead-acid voltage sag, undersized cable or a weak battery in the string.
- Hot plug or breaker: corrosion, a loose connection or an undersized component.
- One battery in the string always low: an accessory tapped from one battery, a failing battery, or a charger bank not working.
- Breaker trips: a fouled prop, an undersized breaker or a short.
Use a multimeter to check voltage at the batteries and at the motor under load. A large difference points to wiring losses.
Building or upgrading your system
If you’re starting from scratch or rebuilding, go in this order: pick the voltage and capacity, plan the battery location, size the cable for the run, choose the breaker and plug, then choose a charger that matches the chemistry. Browse trolling motor batteries and battery chargers in the store when you’re ready.
Frequently asked questions
What size breaker do I need for my trolling motor?
Use the breaker rating your motor’s manual specifies. It is chosen to protect the wire and motor at that motor’s maximum current draw.
Why is my trolling motor losing power?
Common causes are a partly discharged battery, voltage sag in lead-acid batteries, corroded plugs or terminals, undersized cable, or a weak battery in a series string.
Should I use a multi-bank charger for my trolling batteries?
For series strings of 12V batteries, a multi-bank charger with one output per battery is the standard approach. Single-case 24V or 36V lithium batteries need a single charger output at the matching voltage.
Can I charge trolling batteries from my outboard?
Yes, with a DC-DC charger that takes power from the starting system and charges the trolling bank at the correct voltage and profile.