


Building a Lithium House Bank for Liveaboard Life
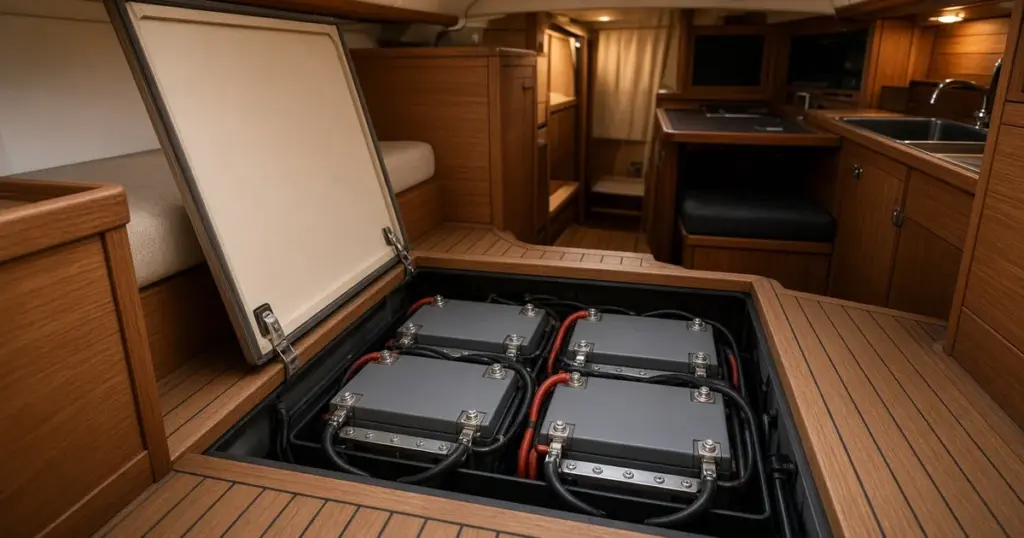
Living aboard puts a house bank to work every single day. Lithium iron phosphate has become the preferred chemistry for many liveaboards because it delivers more usable energy, charges quickly and lasts for thousands of cycles. But a liveaboard lithium battery bank is a system, not just a set of batteries. This guide covers how to size, choose, wire, charge and monitor one.
Why lithium suits liveaboard life
- Usable capacity. You can routinely use about 80% of a lithium bank’s rated capacity, compared with about 50% for lead-acid.
- Charging speed. Lithium accepts high current almost to full, so solar and engine hours go further.
- No need for regular full charges. Lead-acid sulfates when kept partially charged; lithium is happy at partial states of charge.
- Weight. Lithium banks weigh a fraction of equivalent lead-acid banks.
- Steady voltage, which keeps fridges, inverters and electronics happy.
Step 1: Build the energy budget
Before choosing batteries, know your daily use. Our pillar on sailboat and liveaboard battery systems explains the process. Then decide how many days you want to go without significant charging, typically one to three.
Example: 180Ah per day at 12V, two days of autonomy, 80% usable → 180 × 2 ÷ 0.8 = 450Ah.
Step 2: Choose batteries
Options include a single large battery, several mid-size batteries in parallel, or a higher-voltage bank.
| Battery | Energy | Size | Weight | Features |
|---|---|---|---|---|
| EPOCH 12V 460Ah Essential | 5.89 kWh | 8D | 84 lb | Bluetooth, heated |
| EPOCH 12V 334Ah Essential | 4.28 kWh | Group 31 | 60 lb | Bluetooth, heated |
| Battle Born 270Ah 12V GC3 | about 3.5 kWh | GC3 | 80.8 lb | Options vary by variation |
| EPOCH 12V 314Ah Eco | 4.02 kWh | Group 31 | 57 lb | Budget series |
One big battery or several? Several batteries in parallel offer redundancy: if one BMS disconnects, the others keep running. A single big battery simplifies wiring. Follow the battery maker’s limits on how many batteries can be paralleled and how to balance them.
Step 3: Check discharge and charge ratings
Each battery’s BMS has continuous and peak current limits. The bank’s combined rating must exceed your largest loads, especially inverters and windlasses. Check maximum charge current too, which matters with big alternators and chargers.
Step 4: Fusing and switching
Lithium banks can deliver very high short-circuit currents. Use a main fuse with adequate interrupting capacity close to the battery terminals. Class T fuses are commonly specified for large lithium banks. Fuse each parallel battery individually where the maker recommends it, and install a main battery switch rated for the bank’s current.
Step 5: Charging sources
Shore power and inverter/chargers
Set the charger’s lithium profile to the battery maker’s voltages. See charging on the water for an overview of every source.
Solar
Solar is the backbone of many liveaboard systems. Set the charge controller to the battery maker’s lithium voltages. See charging a sailboat without the engine.
Alternator
This is where many lithium installations go wrong. Lithium can draw an alternator’s full output for long periods, which can overheat standard alternators. Options include:
- A DC-DC charger between the starting battery and the lithium bank, which limits current and applies a lithium profile.
- An external smart regulator with alternator temperature sensing, designed for lithium.
- Protection against BMS disconnects, which can cause alternator voltage spikes. Battery makers and regulator makers offer specific guidance.
Step 6: Plan for BMS disconnects
If a BMS disconnects for low voltage, high voltage, temperature or current, loads lose power and charge sources lose their battery. Design so that:
- Critical loads, such as the bilge pump and navigation lights, have a known fallback.
- Charging sources are protected from the voltage spike of a sudden disconnect.
- You know how to recover. Some batteries reconnect automatically, others need a charge source applied.
Step 7: Monitoring
Install a shunt-based monitor for the whole bank. Lithium batteries with Bluetooth add per-battery data, including temperature and cell balance.
Step 8: Temperature
Most lithium batteries shouldn’t be charged below about 32°F. Heated batteries help in cold climates. Avoid installing batteries in hot engine rooms.
Starting battery
Keep a separate starting battery. Charge it from the alternator, and from the house bank via a DC-DC charger or combiner.
Electric propulsion and lithium banks
If you’re considering electric auxiliary propulsion, the house bank and propulsion bank may be linked or separate. See electric sailboat motor batteries.
Upgrading from AGM
If you’re replacing an AGM bank, review charging sources, alternator protection and fusing as part of the project. Our step-by-step guide to upgrading from AGM to lithium covers it. Multihull owners should also read battery banks for cruising catamarans.
Layout tips
- Keep batteries close to the main distribution point and inverter.
- Use equal-length cables to each parallel battery so they share load evenly.
- Use bus bars rather than stacking lugs on terminals.
- Secure batteries against knockdowns.
- Leave access for inspection.
Living with a lithium bank day to day
Once it’s installed, a lithium bank is low-maintenance, but a few habits help:
- Check the monitor morning and evening to learn your boat’s patterns.
- Don’t chase 100% every day. Lithium doesn’t need a daily full charge. Many owners let the bank cycle in a middle range and reach full only periodically, which also gives the shunt monitor a chance to resynchronize.
- Watch for imbalance. If the Bluetooth app shows one battery or cell group consistently different from the others, investigate connections and follow the maker’s balancing guidance.
- Keep connections tight. Check torque on terminals and bus bars after the first few weeks and then periodically; thermal cycling and vibration can loosen them.
- Plan storage. If you leave the boat for weeks, follow the battery maker’s storage recommendations, which often favor a partial state of charge with loads and chargers disconnected or minimized.
Commissioning checklist
- Charge each battery fully before connecting in parallel, if the maker recommends it.
- Configure every charge source’s lithium profile.
- Configure the monitor’s capacity and chemistry.
- Test under load, and confirm alternator behavior and temperature.
- Test a BMS disconnect scenario if the maker provides a safe method.
For more, see house bank sizing for overnight boating and browse lithium batteries in the store.
Frequently asked questions
How big should a liveaboard lithium bank be?
Base it on your daily use and desired days without charging, divided by about 0.8. Many liveaboards end up between about 400Ah and 800Ah at 12V, depending on loads.
Can my alternator charge a lithium house bank?
Yes, with protection. A DC-DC charger or a lithium-capable external regulator with temperature sensing keeps the alternator from overheating and applies the correct profile.
Should I use one big lithium battery or several smaller ones?
Several batteries add redundancy, while one battery simplifies wiring. Follow the battery maker’s guidance on paralleling.
Do lithium house banks need a special fuse?
They need a fuse with enough interrupting capacity for their high short-circuit current, such as a Class T fuse, close to the battery.